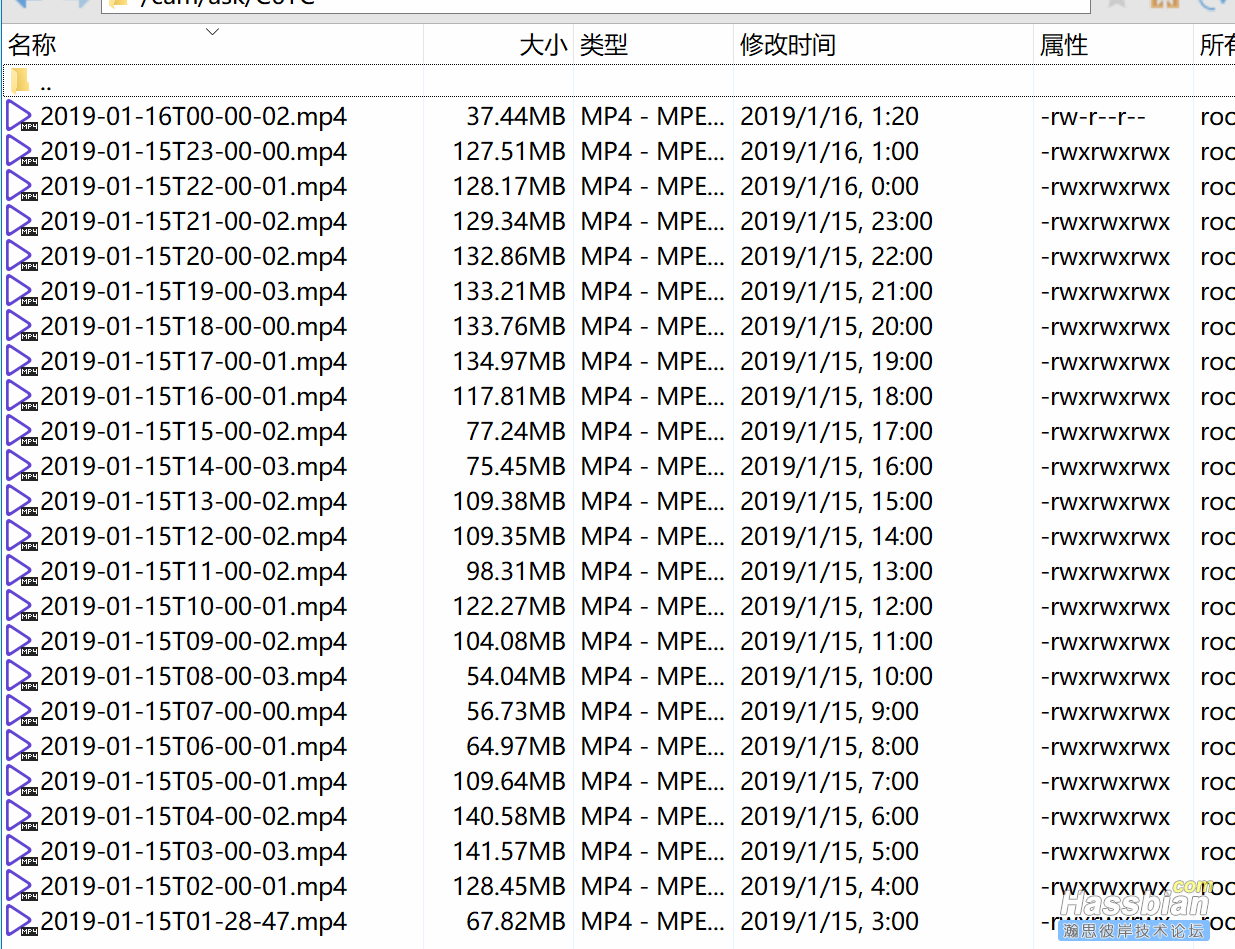
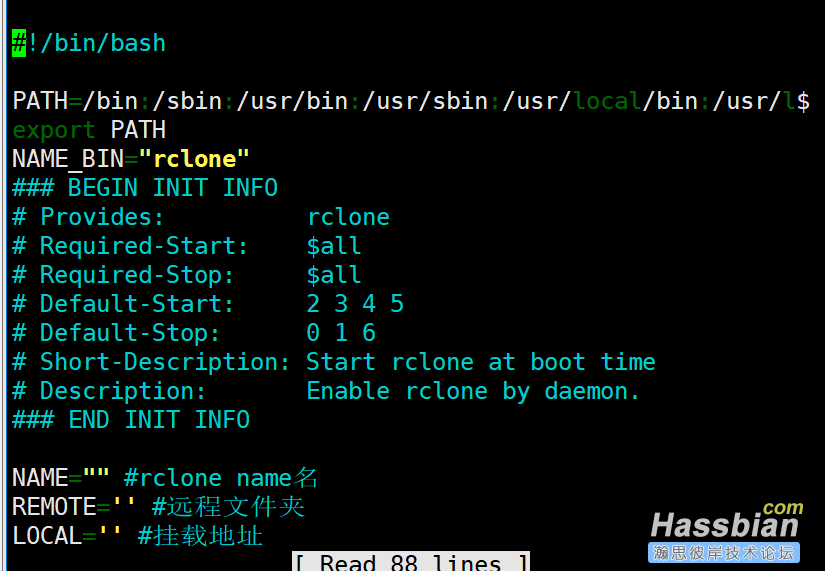
找回密码
 立即注册

QQ登录

只需一步,快速开始

搜索
广告投放联系QQ68610888
查看: 27813|回复: 127

【1.18更新】 debian/N1整合摄像头/监控 并自动上传googledrive

 火.. [复制链接]
发表于 2019-1-13 02:24 | 显示全部楼层 |阅读模式
本帖最后由 jc78256 于 2019-1-18 10:59 编辑

1.18更新
收到反馈说N1各种不稳定,其实大家说的我还真没遇到过。我自己遇到的情况是。
原来4.19内核每隔一段时间N1会变的很卡,SSH也很卡,然后录制会被分割成一分钟几段,还会有损坏。
是什么引起的。就不得而知了,说不定是断网引起的吧。
如图

然后我更换了最新5的内核,录制一天一夜没有发现这个问题


期间断网是肯定有过的。依然稳定录制。就当解决了吧。

我也觉得回帖是个好习惯~亲

自己没有什么电脑基础,由于某些特殊原因不能用到盗版和破解软件,所以这么麻烦的折腾了。
其实win平台直接iSpy,群晖平台自带套件(还可以破解授权)甚至用萤石摄像头的直接官方软件,都是很好的解决方案。
有很多地方一知半解,也是本着记笔记的性质发上来,现阶段只能说是能用,稳定性什么的正在测试中。有很多安装环节也是不懂就默认,希望有经验的巨佬能给一点指导性意见。
在ESXI里的debian9(简称ESXI)和N1的darmbian(简称N1)最新版上通过。
安装debian9或者armbian后
使用root登录
更新 升级

ESXI
  1. apt update && apt upgrade -y && apt install curl wget fuse sudo open-vm-tools -y
复制代码
如果是物理机装open-vm-tools就不要了。

N1
  1. apt update && apt upgrade -y && apt install curl nano wget unzip fuse sudo -y

复制代码

安装shinobi(请根据实际情况安装)
  1. bash <(curl -s https://gitlab.com/Shinobi-Systems/Shinobi-Installer/raw/master/shinobi-install.sh)
复制代码

您想为Shinobi安装自定义位置吗?
我这选是,输入y,回车出现Example : /home 再回车。

安装CE版还是Pro版?
我这选Pro,因为听起来很厉害的样子。回车。

是否安装开发分支?
其实我也不懂要不要装,我自己选y,回车。默认是不安装。

选择你的系统
Select your OS
Debian基于ubuntu,所以选ubuntu。1,回车。

让你安装
呢就装呗,回车。

对不起我翻译不出来了。
按y回车。

要root密码
呢就输入密码。后回车。

安装shinobi的数据库
按y,回车。

N1会卡在这里
英语不是很懂,但是看界面是找不到匹配的什么,然后她在自动编译。得花一点时间。ESXI没有这个情况。

shinobi开机自启动
当然y,回车。

使用shinobi
安装完成后,会输入一堆信息。登录接口和默认id。
进入,http://你的ip:8080/super
使用admin@shinobi.video和admin登录。

制作一个ID
我这里有一个被坑到的地方就是,记得把浏览器最大化,不然添加账号的小加号不出来。

Email随意写,不用太认真。Group Key不写就会随机出一段数字,那一段数字会成为一个文件夹。
一般无所谓,强迫症不能忍。我自己就写了前四个,其他全默认了。也在进去后找到了改的地方。

登录后添加摄像头为观看模式。
进入,http://你的ip:8080/ 用刚才制作的id登录。
点击左上角的小加号,添加摄像头。我自己以萤石为例,添加一个。
里面的参数不是很懂,希望懂的好汉站出来教一教我。
仅是记录自己改的地方。请按照实际情况修改。

Monitor ID 会变成文件夹,强迫症不能忍。
Name 名字
Full URL Path 萤石是rtsp://admin:二维码旁的六位密码@摄像头IP:554/
Monitor Capture Rate 20
Accelerator Yes
Stream Type Base64 over Websocket
Quality 0
Width 1280
Height 720

这是一个多此尝试,较优的方案,但任然有一秒左右的延迟。远高于群晖套件和iSpy,请会配置的大佬务必告知!

挂载其他硬盘
以ESXI为例
添加硬盘后,用fdisk -l查看,然后我的ESXI需要重启两次才能找到新硬盘。
这个32G的就是。

然后进入磁盘,对磁盘进行分区
  1. fdisk /dev/sdb
复制代码

整个界面是这样的

  1. fdisk -l
复制代码


已经有分区了。呢接下来就格式化。
  1. mkfs.ext4 /dev/sdb1
复制代码

完成后 创建目录
  1. mkdir /cam
复制代码

挂载分区
  1. mount /dev/sdb1 /cam
复制代码

开机自挂载
  1. nano /etc/fstab
复制代码

写入
  1. /dev/sdb1 /cam ext4 defaults  0  0
复制代码


重启一下 我反正是成了 还有N1我这里是sda这个要看仔细

Shinobi录像到刚才挂载的盘
打开安装目录/Shinobi/conf.json
我自己是
cd /root/Shinobi
找到
     {"name":"second","path":"__DIR__/videos2"}
这一行
See __DIR__ ? This means that it will startin the directory in which Shinobi is started. This points to /home/Shinobi inour example.
The path is as you put it aside from the__DIR__ being replace with the working directory.
The name appears in the dashboard for theoptions in the Storage Location selector.


这是官网解释,就是说,嗯可能。。。这是一个备胎,默认录到/Shinobi/videos
然后呢__DIR__是安装目录的意思
也就是说,改成
     {"name":"名字","path":"目录"}
我改成
     {"name":"hdd","path":"/cam"}

进入shinobi界面,打开摄像机的小扳手设置。
Mode改为Record
Storage Location改为刚才的名字,我是hdd

最下面一个RecordingSegment Interval 应该是每段视频的录制时间,我单位是分钟。


有了有了
在总设置界面可以选择保留天数,限制容量等。

安装Rclone把录像同步到网盘
时隔一天,发现系统还算稳定。录像也是按照一小时一分段在进行。


你们看 录制了这么多了
下面开始安装Rclone
ESXI可以自动安装
  1. curl https://rclone.org/install.sh | sudo bash
复制代码

N1 需要手动安装
  1. wget https://downloads.rclone.org/rclone-current-linux-arm.zip
复制代码
  1. unzip rclone-current-linux-arm.zip
  2. chmod 0777 ./rclone-*/rclone
  3. cp ./rclone-*/rclone /usr/bin/
  4. rm -rf ./rclone-*
复制代码


配置 大篇幅引用还是注明一下好
https://timelate.com/archives/install-rclone-on-ubuntu.html


2018/10/18 13:09:51NOTICE: Config file "/root/.config/rclone/rclone.conf" not found -using defaults
No remotes found -make a new one
n) New remote
s) Set configuration password
q) Quit config
n/s/q> n  #输入n,新建一个remote
name> google-drive  #起个名字,这里以 google-drive 为例,后面同步文件时会用到
Type of storage to configure.
Enter a string value. Press Enter for the default ("").
Choose a number from below, or type in your own value
1 / A stackable unification remote,which can appear to merge the contents of several remotes
   \ "union"
2 / Alias for a existing remote
   \ "alias"
3 / Amazon Drive
   \ "amazon cloud drive"
4 / Amazon S3 Compliant Storage Providers (AWS,Ceph, Dreamhost, IBM COS, Minio)
   \ "s3"
5 / Backblaze B2
   \ "b2"
6 / Box
   \ "box"
7 / Cache a remote
   \ "cache"
8 / Dropbox
   \ "dropbox"
9 / Encrypt/Decrypt a remote
   \ "crypt"
10 / FTP Connection
   \ "ftp"
11 / Google Cloud Storage (this is not Google Drive)
   \ "google cloud storage"
12 / Google Drive
   \ "drive"
13 / Hubic
   \ "hubic"
14 / JottaCloud
   \ "jottacloud"
15 / Local Disk
   \ "local"
16 / Mega
   \ "mega"
17 / Microsoft Azure Blob Storage
   \ "azureblob"
18 / Microsoft OneDrive
   \ "onedrive"
19 / OpenDrive
   \ "opendrive"
20 / Openstack Swift (Rackspace CloudFiles, Memset Memstore, OVH)
   \ "swift"
21 / Pcloud
   \ "pcloud"
22 / QingCloud Object Storage
   \ "qingstor"
23 / SSH/SFTP Connection
   \ "sftp"
24 / Webdav
   \ "webdav"
25 / Yandex Disk
   \ "yandex"
26 / http Connection
   \ "http"
Storage> 12 #输入12,选择 Google Drive
** See help for drive backend at: https://rclone.org/drive/ **
Google Application Client Id
Leave blank normally.
Enter a string value. Press Enter for the default ("").
client_id>  #留空,直接回车
Google Application Client Secret
Leave blank normally.
Enter a string value. Press Enter for the default ("").
client_secret>  #留空,直接回车
Scope that rclone should use when requesting access from drive.
Enter a string value. Press Enter for the default ("").
Choose a number from below, or type in your own value
1 / Full access all files, excluding Application Data Folder.
   \ "drive"
2 / Read-only access to file metadata and file contents.
   \ "drive.readonly"
   / Access to files created by rclone only.
3 | These are visible in the drive website.
   | File authorization is revoked when the user deauthorizes the app.
   \ "drive.file"
   / Allows read and write access to the Application Data folder.
4 | This is not visible in the drive website.
   \ "drive.appfolder"
   / Allows read-only access to file metadata but
5 | does not allow any access to read or download file content.
   \ "drive.metadata.readonly"
scope> 1 #这里选1Full access
ID of the root folder
Leave blank normally.
Fill in to access "Computers" folders. (see docs).
Enter a string value. Press Enter for the default ("").
root_folder_id>   #留空,直接回车
Service Account Credentials JSON file path
Leave blank normally.
Needed only if you want use SA instead of interactive login.
Enter a string value. Press Enter for the default ("").
service_account_file>   #留空,直接回车
Edit advanced config? (y/n)
y) Yes
n) No
y/n> n #输入n,不进行高级配置
Remote config
Use auto config?
* Say Y if not sure
* Say N if you are working on a remote or headless machine or Y didn't work
y) Yes
n) No
y/n> n #输入n,不使用自动配置
#回车之后会出现一串网址,复制网址到电脑浏览器打开,登陆自己的谷歌账号,获得授权code,复制此code
If your browser doesn't open automatically go to the following link:https://accounts.google.com/o/oauth2/auth?access_type=offline&client_id=202264815644.apps.googleusercontent.com&redirect_uri=urn%3Aietf%3Awg%3Aoauth%3A2.0%3Aoob&response_type=code&scope=https%3A%2F%2Fwww.googleapis.com%2Fauth%2Fdrive&state=3bnvsdf3514f98710fe9c9ef38770lkmxa
Log in and authorize rclone for access
Enter verificationcode> 4/fABXKI1n3Q6Go5k28QJWLgruilsmszhRf8w9bRRqFVihPb08lpddbw  #粘贴code,回车
Configure this as a team drive?
y) Yes
n) No
y/n> n  #输入n,不配置为团队硬盘
--------------------
[google-drive]
type = drive
scope = drive
token = {"access_token":"ya29.Gls6Bs6JkTo3HCfXKpeUv-Hg9uq9QXPZ-itJum2cv2xDAeUTUp15qAlh2FVrGtuDhpRyBp-6bx0dMPj","token_type":"Bearer","refresh_token":"1/4zPbnV-XGj3Ld_Rggr6E5_2mzSu5Cu4qkw_OZ8e-pgDulS78OZka","expiry":"2018-10-18T14:13:46.118120025Z"}
--------------------
y) Yes this is OK
e) Edit this remote
d) Delete this remote
y/e/d> y  #输入y,确认
Current remotes:
Name                 Type
====                 ====
google-drive         drive
e) Edit existingremote
n) New remote
d) Delete remote
r) Rename remote
c) Copy remote
s) Set configuration password
q) Quit config

e/n/d/r/c/s/q> q  #输入q,退出配置
其中有一问是
Configure this as a team drive?
按照我的理解就是,一般注册的就不是n,那种无限的就是y。我自己是。

在云盘里创建一个文件夹,名字随意,我ESXIESXIN1N1

N1为例
下载自启动脚本。
  1. wget https://www.moerats.com/usr/shell/rcloned && nano rcloned
复制代码

下载完毕会自动打开


分别输入
NAME="google-drive" #rclone name
REMOTE='N1' #远程文件夹
LOCAL='/root/google-drive' #挂载地址
这只是我的数据,请根据实际情况修改。

完成后,退出,退出后,设置挂载和自启动。
  1. mv rcloned /etc/init.d/rcloned
  2. chmod +x /etc/init.d/rcloned
  3. update-rc.d -f rcloned defaults
  4. bash /etc/init.d/rcloned start
复制代码


启动失败我遇到过两种,一种是路径不对,一种是没装fuse
进行自动同步

关于copysync的官方解释。

rclone copy - Copy files from source to dest, skipping already copied.
rclone sync - Make source and dest identical, modifying destination only.


就是说,copy就是字面意思,但是云端有了的文件就不再复制一次了。
Sync 用群晖的话说就是,仅上传本地更改。
嗯大概吧,反正那位好汉测试一下就知道了,我是无限盘,选择copy

还是引用yhsiao

复制的命令格式如下:
rclone copy /path/to/local/copy remote_name:path/to/files
例如,将本地 /home/download 目录下的 timelate.zip 复制到 Google Drive 的 Sync/backup/ 目录下:
rclone copy /home/download/timelate.zip google-drive:Sync/backup/
例如,将本地 /home/download 目录下的movies目录复制到 Google Drive 的 Sync/backup/ 目录下:
rclone copy /home/download/movies google-drive:Sync/backup/movies


呢我自己的就是
rclone copy /cam google-drive:N1/ --transfers=8
--transfers=8是八门齐开的意思。
本帖隐藏的内容八线程同时上传的意思,为示例随便写的,其实示例只接入了一个摄像头,什么都不写也可以的。

因为我已经多次测试 没有问题,所以直接写定时脚本了。

  1. crontab -e
复制代码

然后选择喜欢的编辑器

在最后一行加入

  1. */60 * * * * rclone copy /cam google-drive:N1/ --transfers=8
复制代码

每隔六十分钟上传一次,因为我之前设置的是一段录像六十分分钟。
重启服务

  1. service cron restart
复制代码

写入开机自启动

  1. systemctl enable cron
复制代码

成功了。我会不间断测试一个月左右的稳定性。

后记
原计划是docker安装Zoneminder,占用大量系统资源,一天一夜录制上传之后被杀掉了进程。
但是Zoneminder的兼容性确实比shinobi好,一个杂牌摄像头,群晖,Zoneminder,ispy,shinobi,只有shinobi录制的时候总是黑屏。
另外,下面的地址可以找到Zoneminder的安装方法,x86可以,N1网页不出来。系统资源方面,直接安装比docker好很好。相对。
https://wiki.zoneminder.com/Debian_9_64-bit_with_Zoneminder_1.30.4_the_Easy_Way


点评

shinobi移动侦测的功能如何?我装的是zoneminder,只用来做移动侦测。如果只需要不间断录制功能,ffmpeg+cron就够了  发表于 2019-1-20 06:51

评分

参与人数 5恩山币 +5 收起 理由
qx*** + 1 添加外网摄像头占用多少宽带呀。
coc*** + 1 面对这种帖子,我内心复杂,真不知道说什么好……
tzy*** + 1 强大的恩山!(以下重复1万次)
2867*** + 1 有没尝试过用FFmpeg?
lo*** + 1 楼主你好,首先感谢你的教程。我按照你的教程,安装了shinoi,然后添加摄像头这

查看全部评分

我的恩山、我的无线 The best wifi forum is right here.
发表于 2019-1-13 08:49 | 显示全部楼层
感谢分享,mark
我的恩山、我的无线 The best wifi forum is right here.
回复

使用道具 举报

发表于 2019-1-13 12:13 | 显示全部楼层
我也想弄个云摄像头,或者n1当存储的!    做成wifi摄像头或者录像主机
我的恩山、我的无线 The best wifi forum is right here.
回复

使用道具 举报

 楼主| 发表于 2019-1-15 02:03 | 显示全部楼层
@浪客教主 @hat007 更新了可行办法了。
我的恩山、我的无线 The best wifi forum is right here.
回复

使用道具 举报

 楼主| 发表于 2019-1-15 02:03 | 显示全部楼层
本帖最后由 jc78256 于 2019-1-18 10:59 编辑
自己测试了几天,来一个汇报吧。
首先 X86平台下一直稳定。
然后N1下会有问题,过一段或长或短的时间后N1会变得很卡,视频会被分割成一分钟几份。
正在积极解决。目前测试一下最新内核和坛友的4.18和3.14会不会有这个问题再说。

还有分享一个小经验,我一个杂牌摄像头,264的串流总是断,改为LOCAL之后断的次数在正常范围内,
因为那个摄像头本身就一天会断几次,毕竟杂牌嘛。


总之,有进展会在帖子最后更新。也希望大神们能着手帮帮忙。

5内核问题解决
我的恩山、我的无线 The best wifi forum is right here.
回复

使用道具 举报

发表于 2019-1-15 02:13 | 显示全部楼层
顶,研究研究。。。
我的恩山、我的无线 The best wifi forum is right here.
回复

使用道具 举报

发表于 2019-1-15 06:34 | 显示全部楼层
感谢分享,mark
我的恩山、我的无线 The best wifi forum is right here.
回复

使用道具 举报

发表于 2019-1-15 07:21 | 显示全部楼层
谢谢分享。mark。
我的恩山、我的无线 The best wifi forum is right here.
回复

使用道具 举报

发表于 2019-1-15 08:30 | 显示全部楼层
我来学习下
我的恩山、我的无线 The best wifi forum is right here.
回复

使用道具 举报

发表于 2019-1-15 08:34 | 显示全部楼层

Thanks for share.
我的恩山、我的无线 The best wifi forum is right here.
回复

使用道具 举报

发表于 2019-1-15 08:40 | 显示全部楼层
我来学习下,谢谢分享
我的恩山、我的无线 The best wifi forum is right here.
回复

使用道具 举报

发表于 2019-1-15 08:42 | 显示全部楼层
什么叫无限G盘?
是谷歌盘?
我的恩山、我的无线 The best wifi forum is right here.
回复

使用道具 举报

发表于 2019-1-15 08:45 | 显示全部楼层
谢谢分享。mark。
我的恩山、我的无线 The best wifi forum is right here.
回复

使用道具 举报

发表于 2019-1-15 08:47 | 显示全部楼层
ubuntu是基于debian的,打的时候弄反了吧
我的恩山、我的无线 The best wifi forum is right here.
回复

使用道具 举报

发表于 2019-1-15 09:33 | 显示全部楼层
这个帖子太好了
我的恩山、我的无线 The best wifi forum is right here.
回复

使用道具 举报

您需要登录后才可以回帖 登录 | 立即注册

本版积分规则

有疑问请添加管理员QQ86788181|手机版|小黑屋|Archiver|恩山无线论坛(常州市恩山计算机开发有限公司版权所有) ( 苏ICP备05084872号 )

GMT+8, 2024-4-26 06:17

Powered by Discuz! X3.5

© 2001-2024 Discuz! Team.

| 江苏省互联网有害信息举报中心 举报信箱:js12377 | @jischina.com.cn 举报电话:025-88802724 本站不良内容举报信箱:68610888@qq.com 举报电话:0519-86695797

快速回复 返回顶部 返回列表